# floor-plan-use-the-floor-opening-tool-to-draw-the-hole
> Discover how to draw various floor openings using Coohom's shape tools. Create and edit unique openings easily. Chamfer support included. Start designing now.
- **URL**: https://www.coohom.com/helpcenter/floor-plan-use-the-floor-opening-tool-to-draw-the-hole
- **Locale**: en_US
- **Updated**: 2026-06-11
## Content
Draw openings on floor slabs or ceiling slabs for void spaces, stair openings, etc., and the contours of the openings can be edited for better design effects.
⭐Before reading the article, it's recommended to watch the video tutorial first to get started quickly\~
\[Video URL\](https://www.youtube.com/watch?v=l2NARXA6mNw)
For Users
=========
All users
Entrance
========
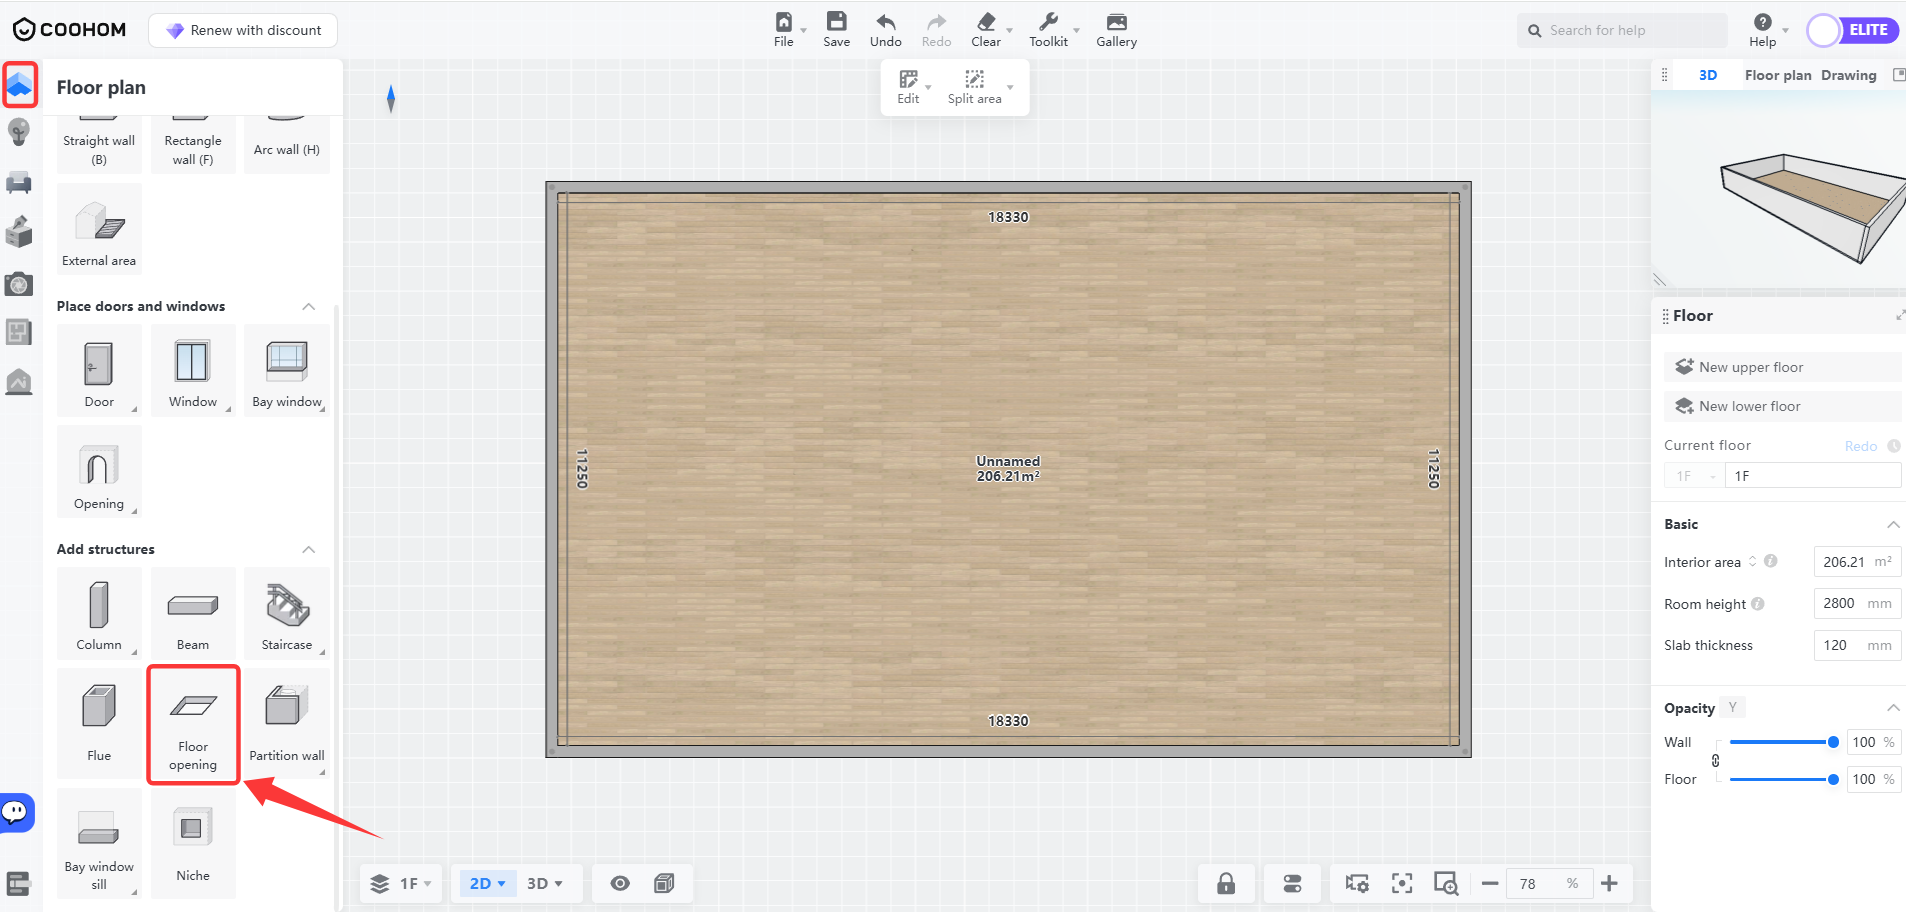
Click **Floor Opening** in the left toolbar on the floor plan page.
Draw Openings
=============
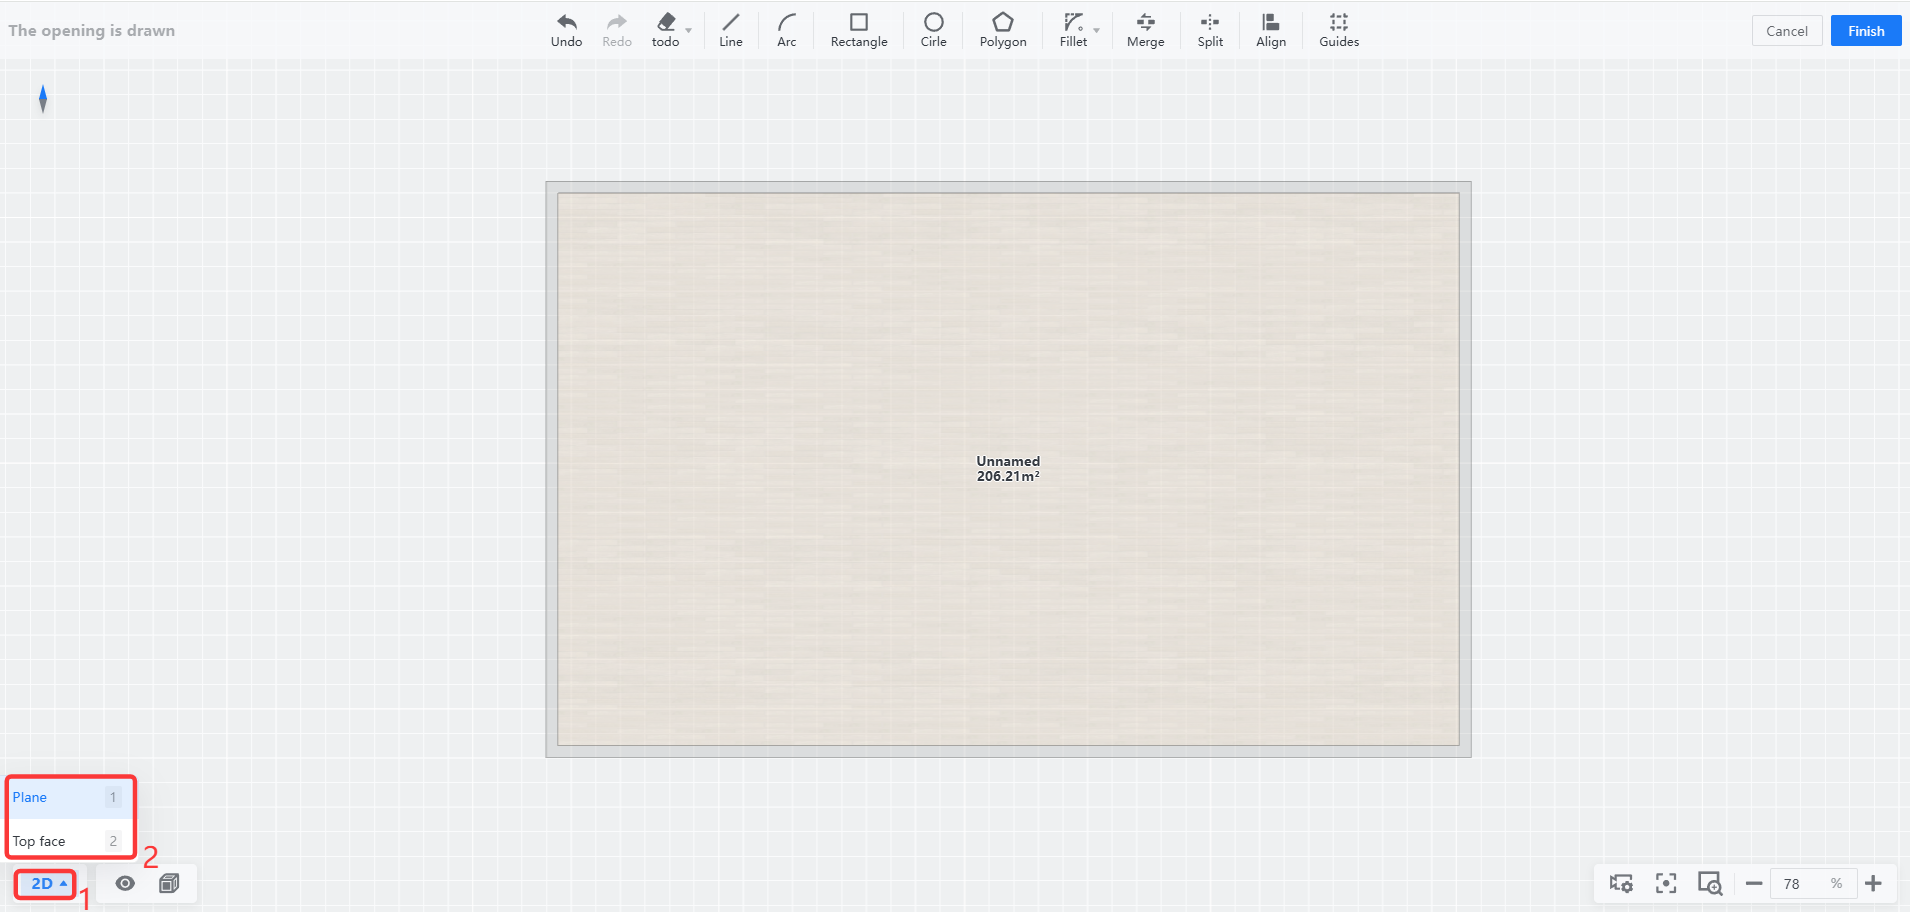
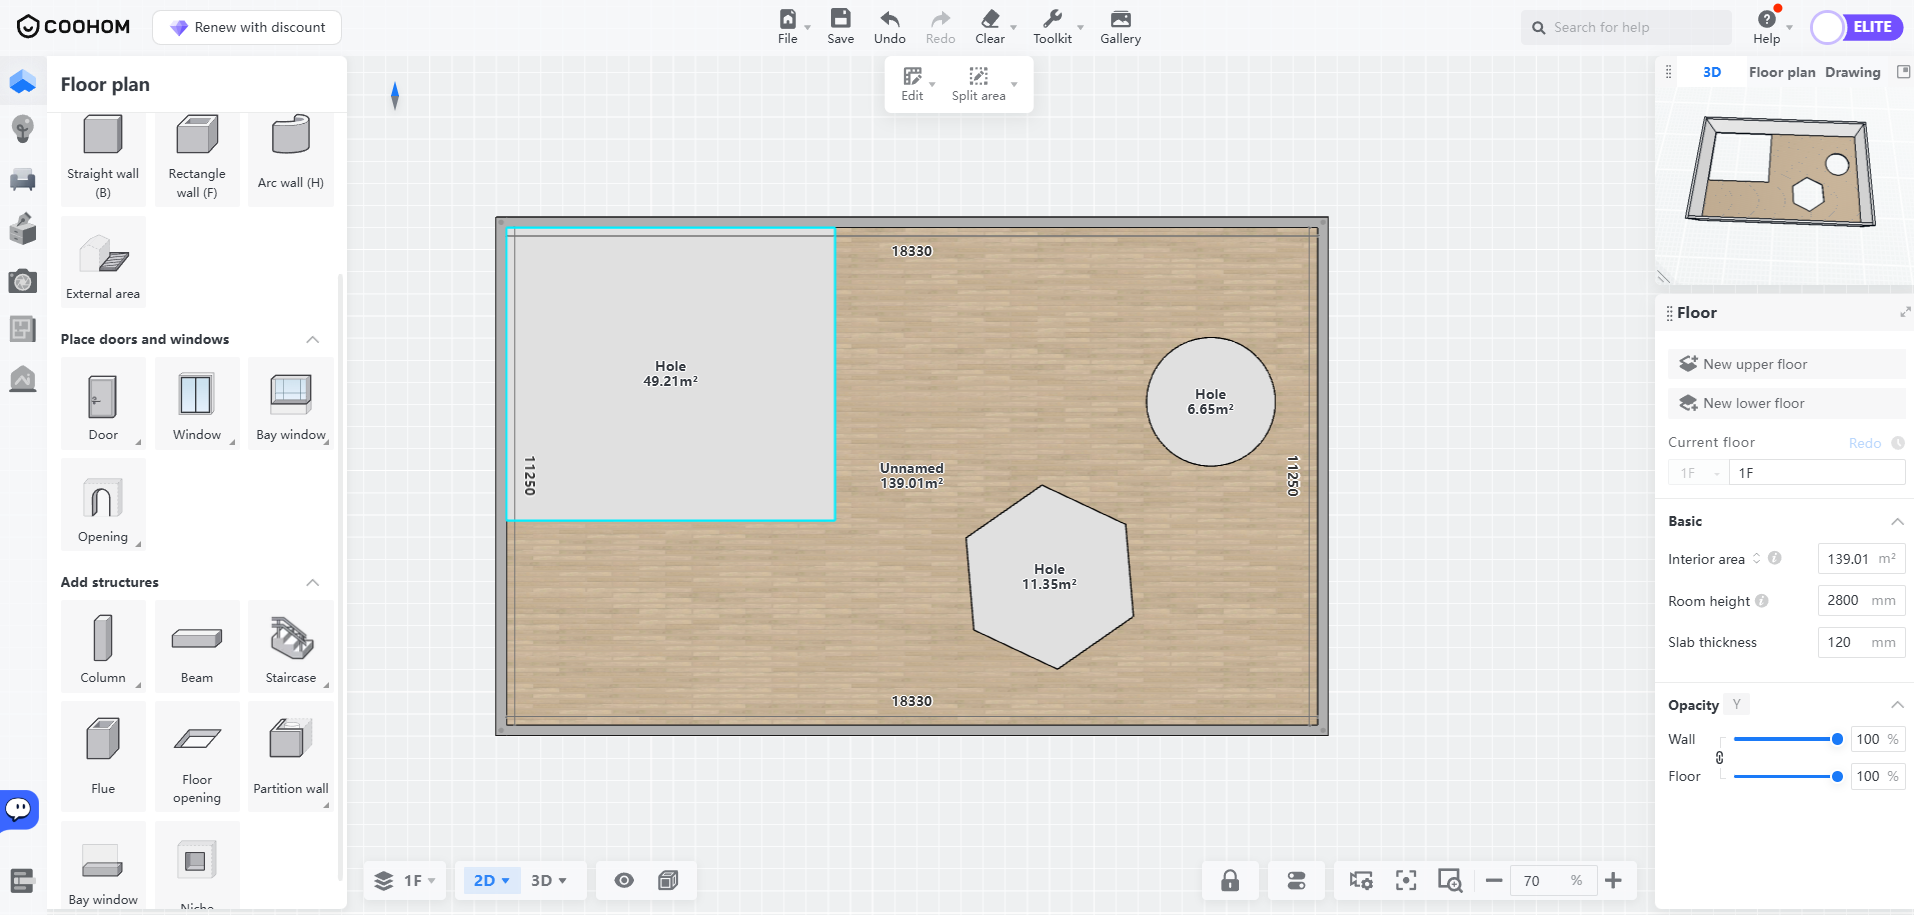
1. Enter the openings drawing page, click the bottom-left corner **2D** to select the location of the opening. Choosing **Plane** creates openings in the floor slabs, while choosing **Top Face** creates openings in the ceiling slabs.
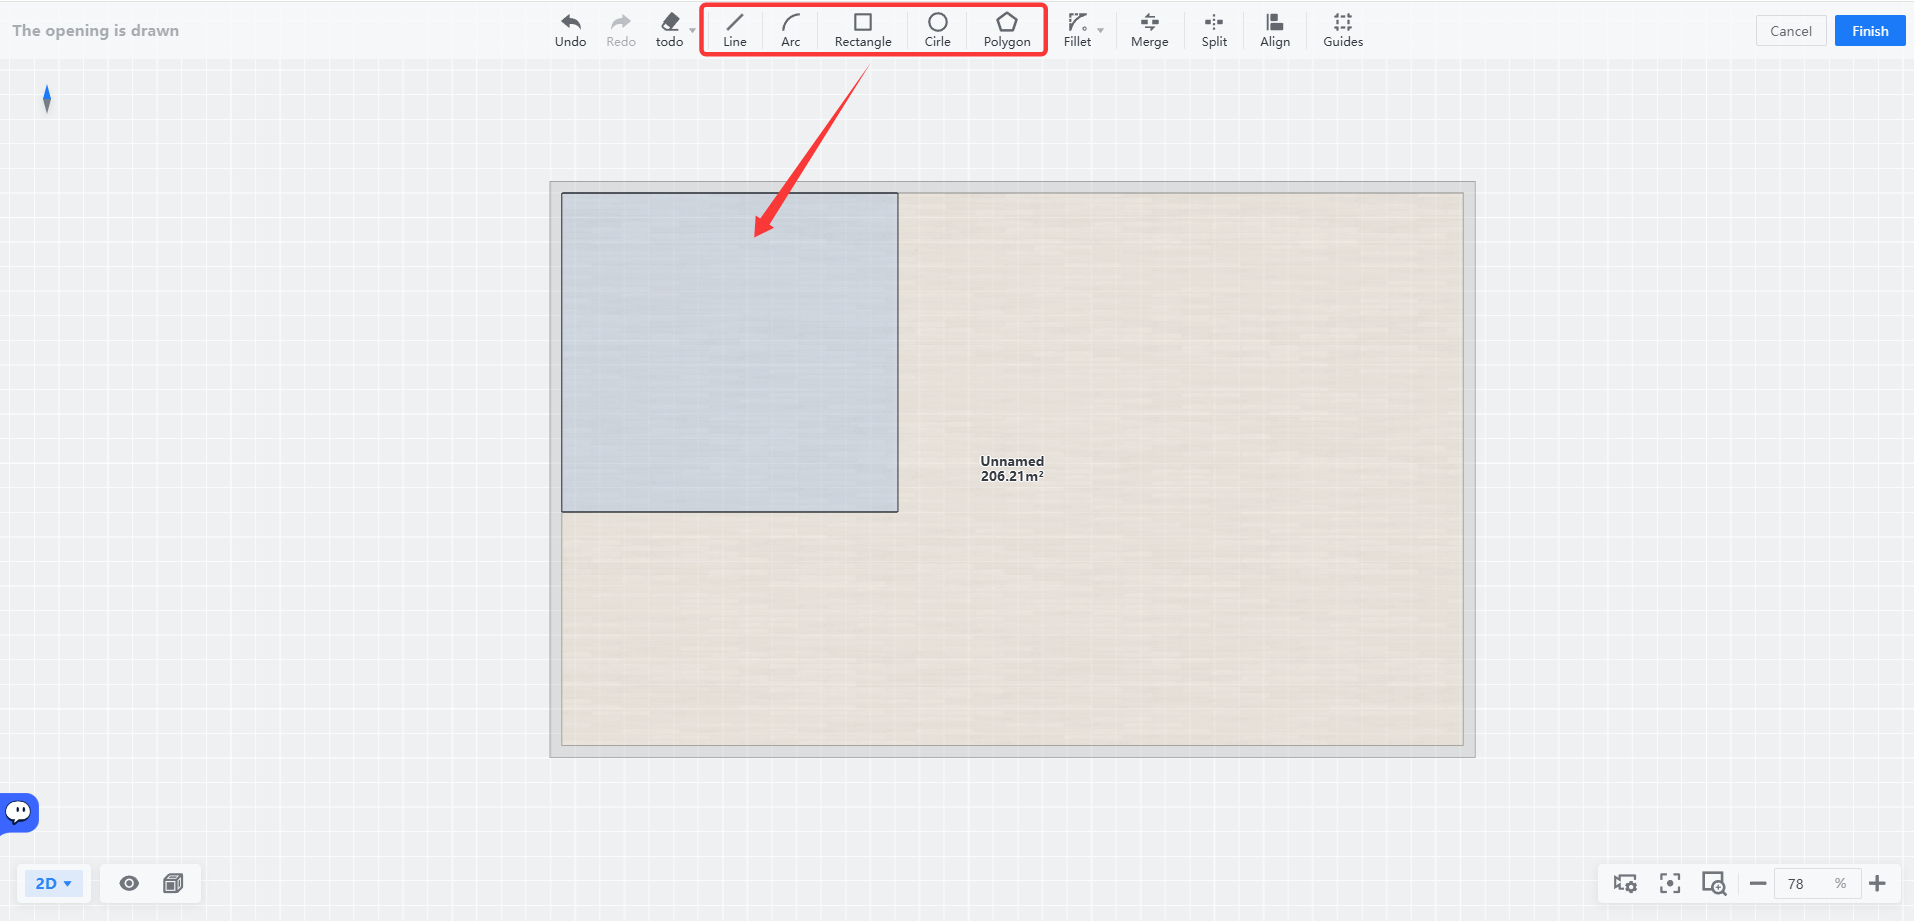
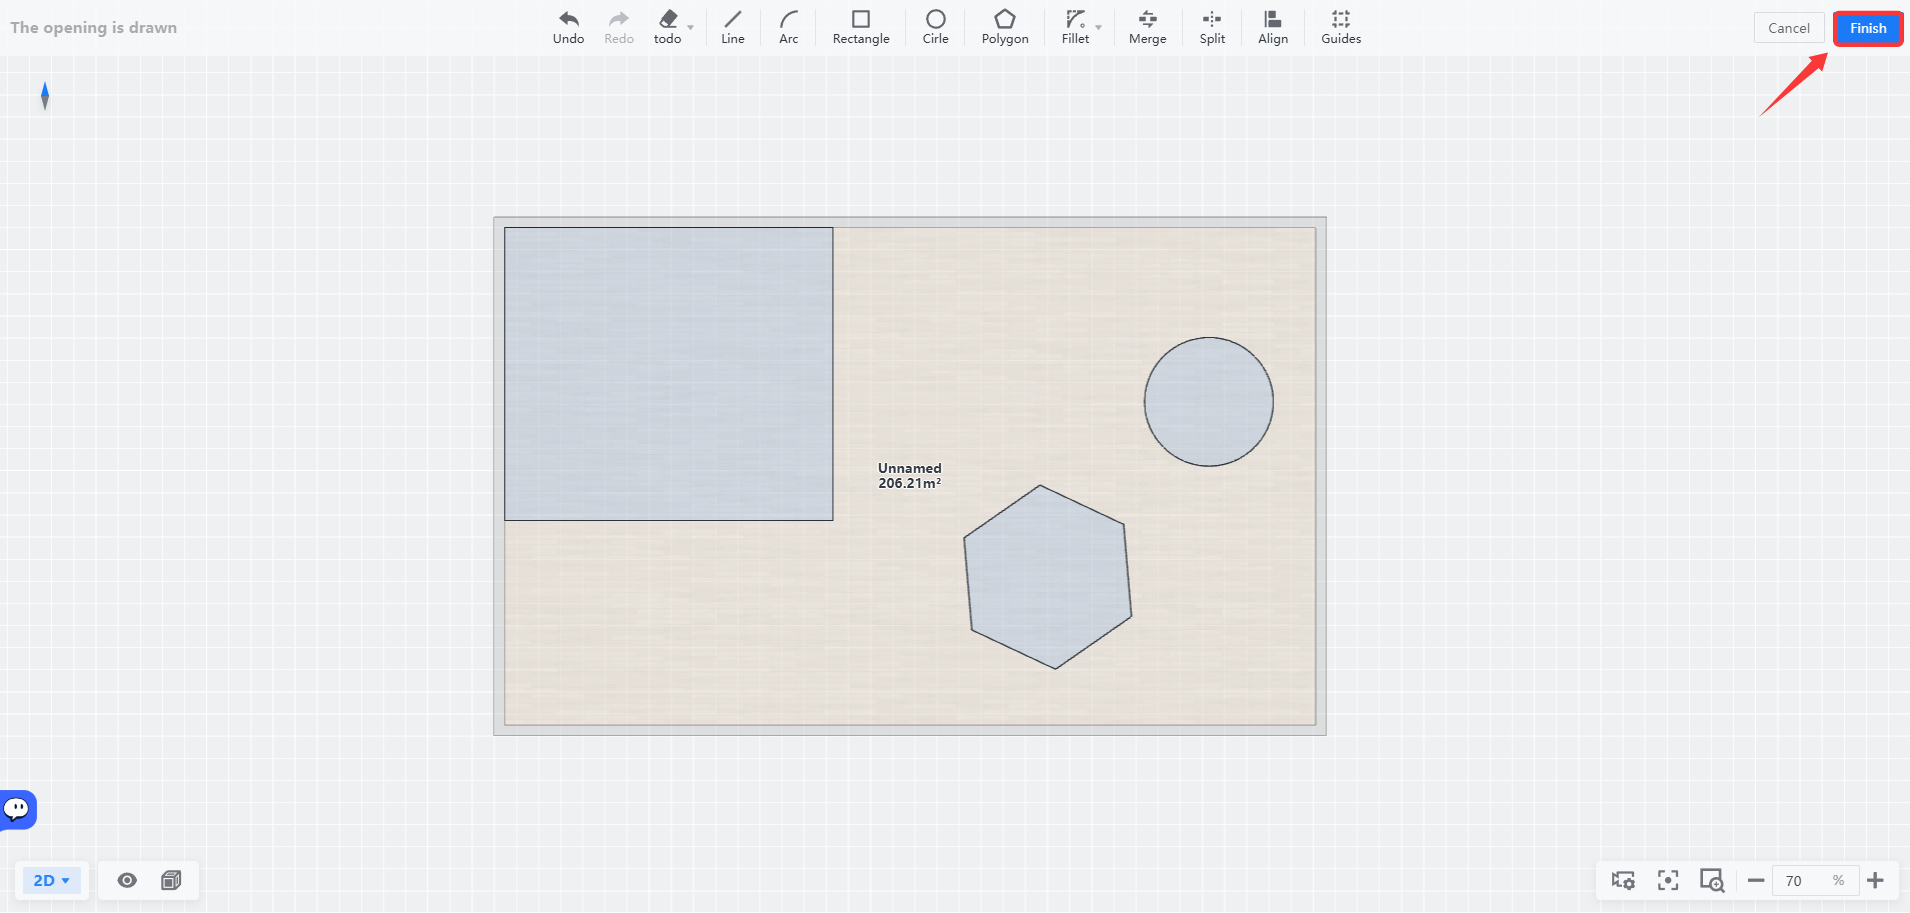
2. Use shape tools such as**Line, Arc, Rectangle** at the top to draw the openings. You can create multiple openings at once. After completing the drawing, click **Finish** in the upper-right corner to successfully generate openings.
Edit Openings
=============
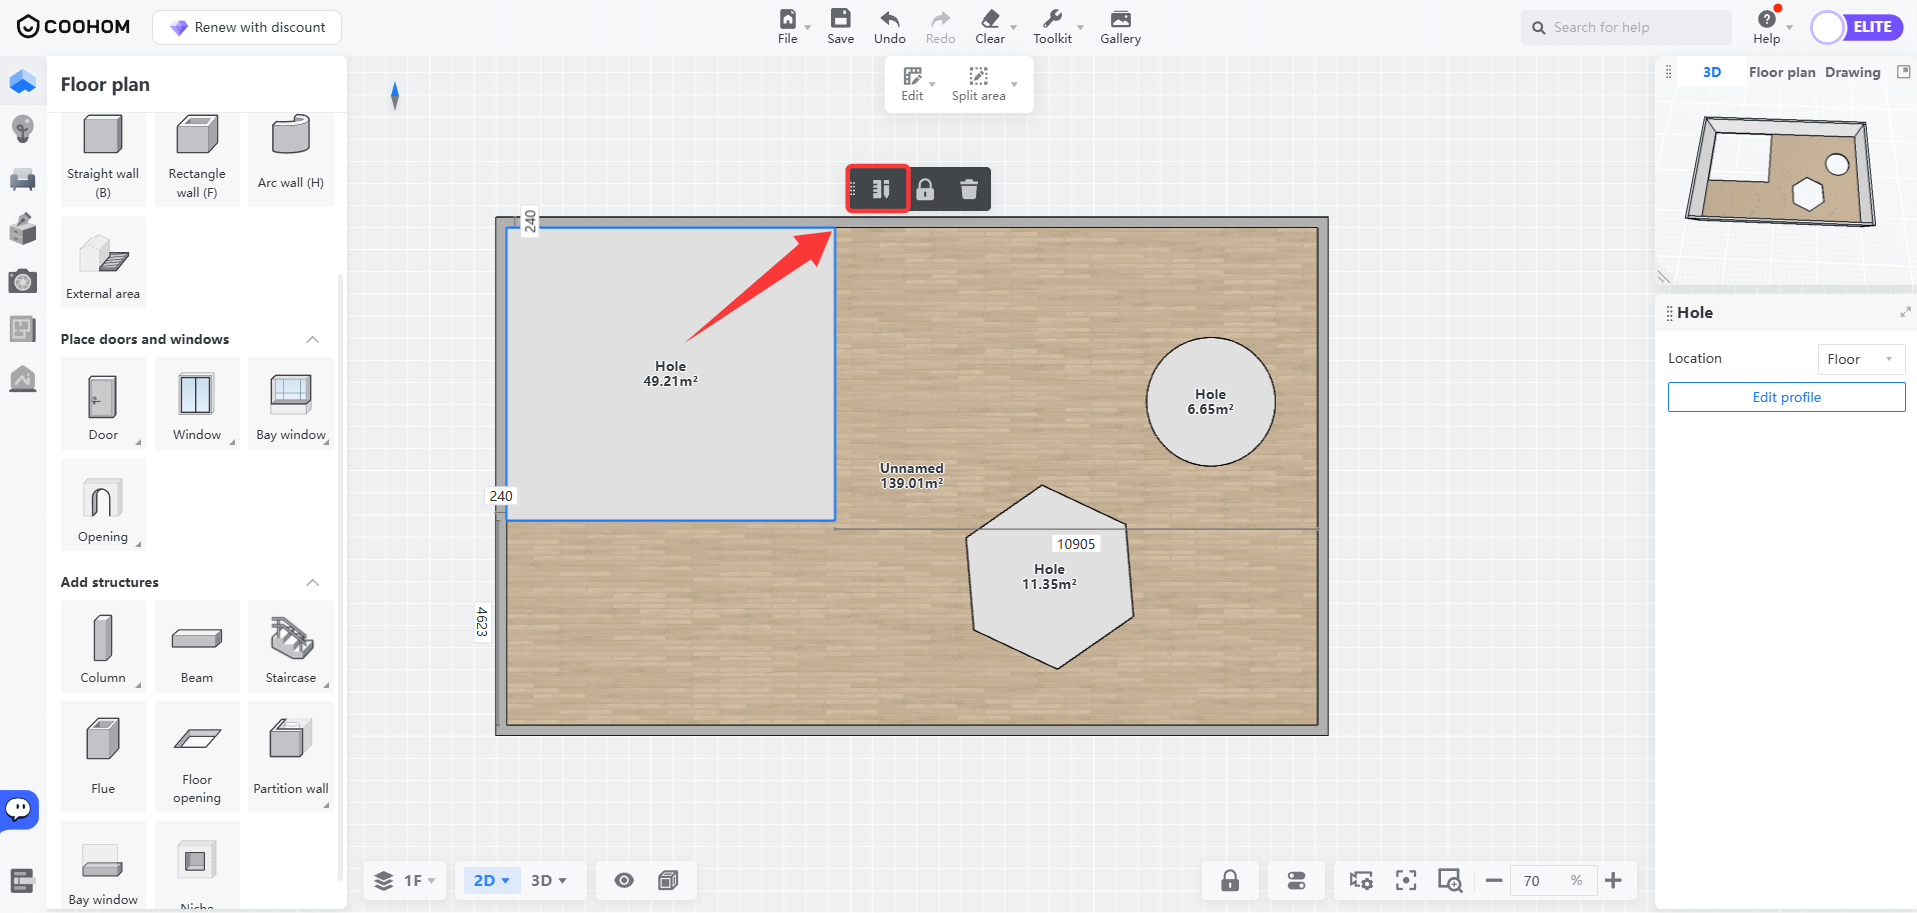
1. Select the opening you want to edit and click **Edit** in the floating window to enter the editing interface.
* You can only edit one opening at a time to ensure the opening is unique.
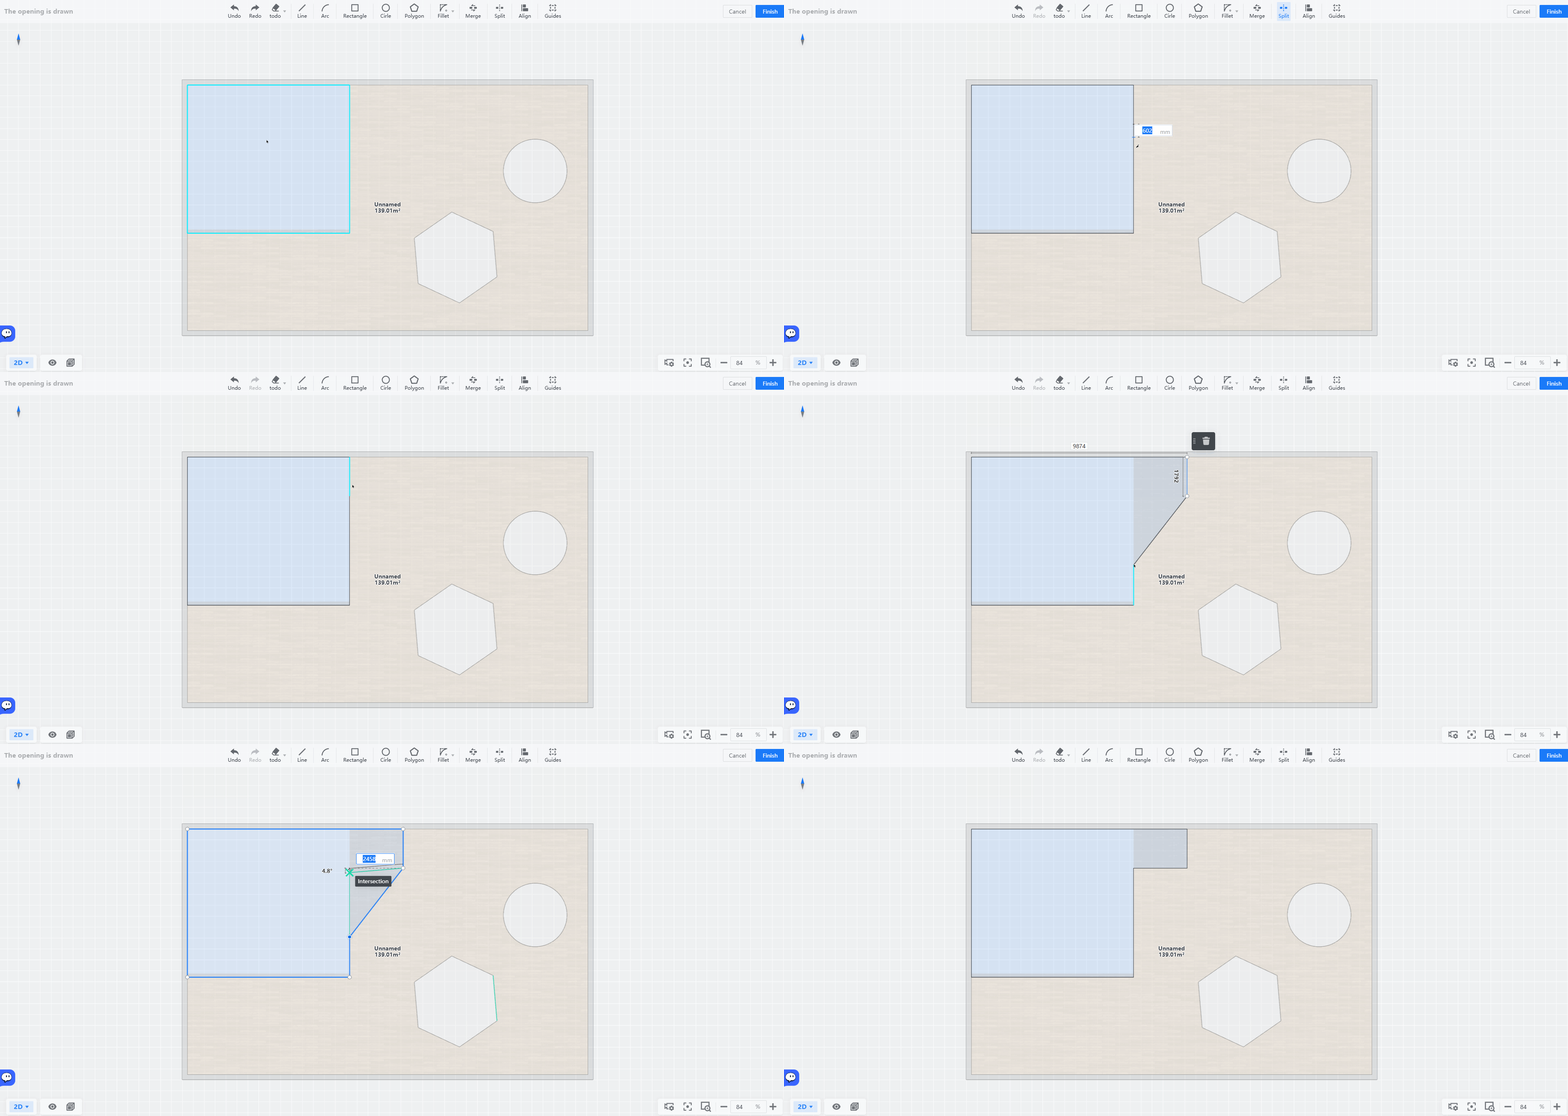
2. In the top toolbar, you can choose different tools to edit the opening contour.
* When selecting the **Split** tool, the original contour line can be divided into multiple segments, making it easier to adjust the shape as needed.
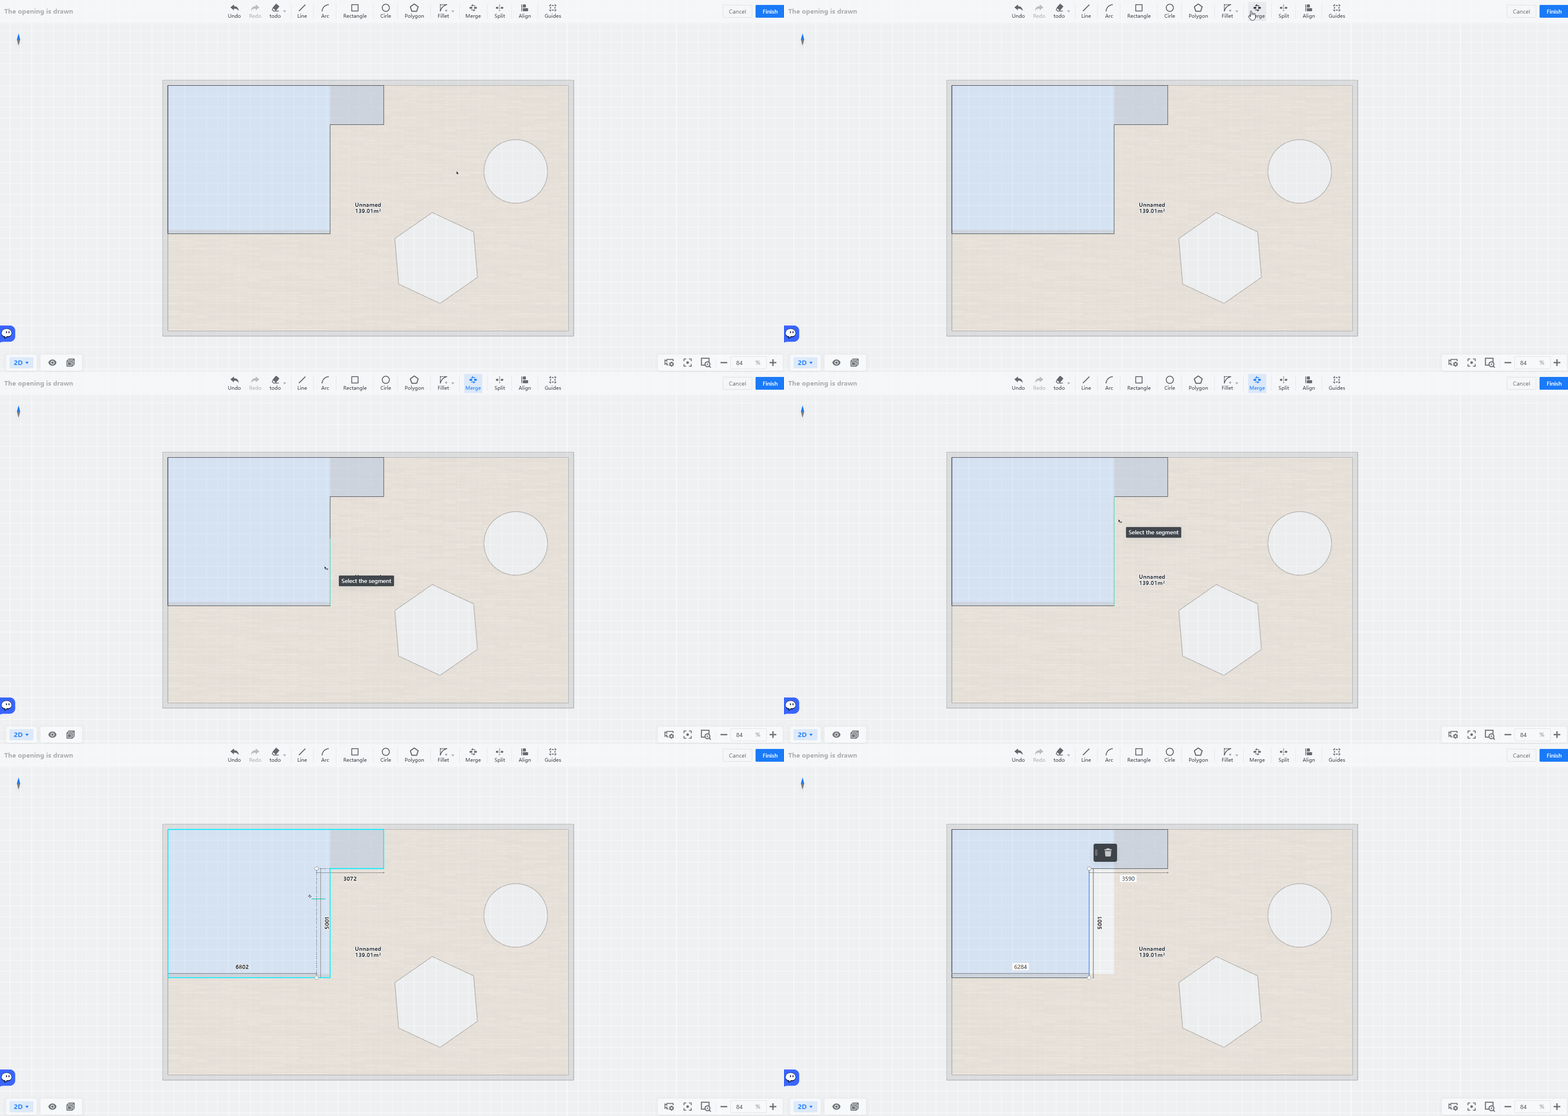
* When selecting the **Merge** tool, the segmented contour lines can be merged back into one piece, facilitating overall movement and size adjustments.
* When selecting the**Align**tool, contour lines not on the same horizontal plane can be quickly aligned to the same straight line.
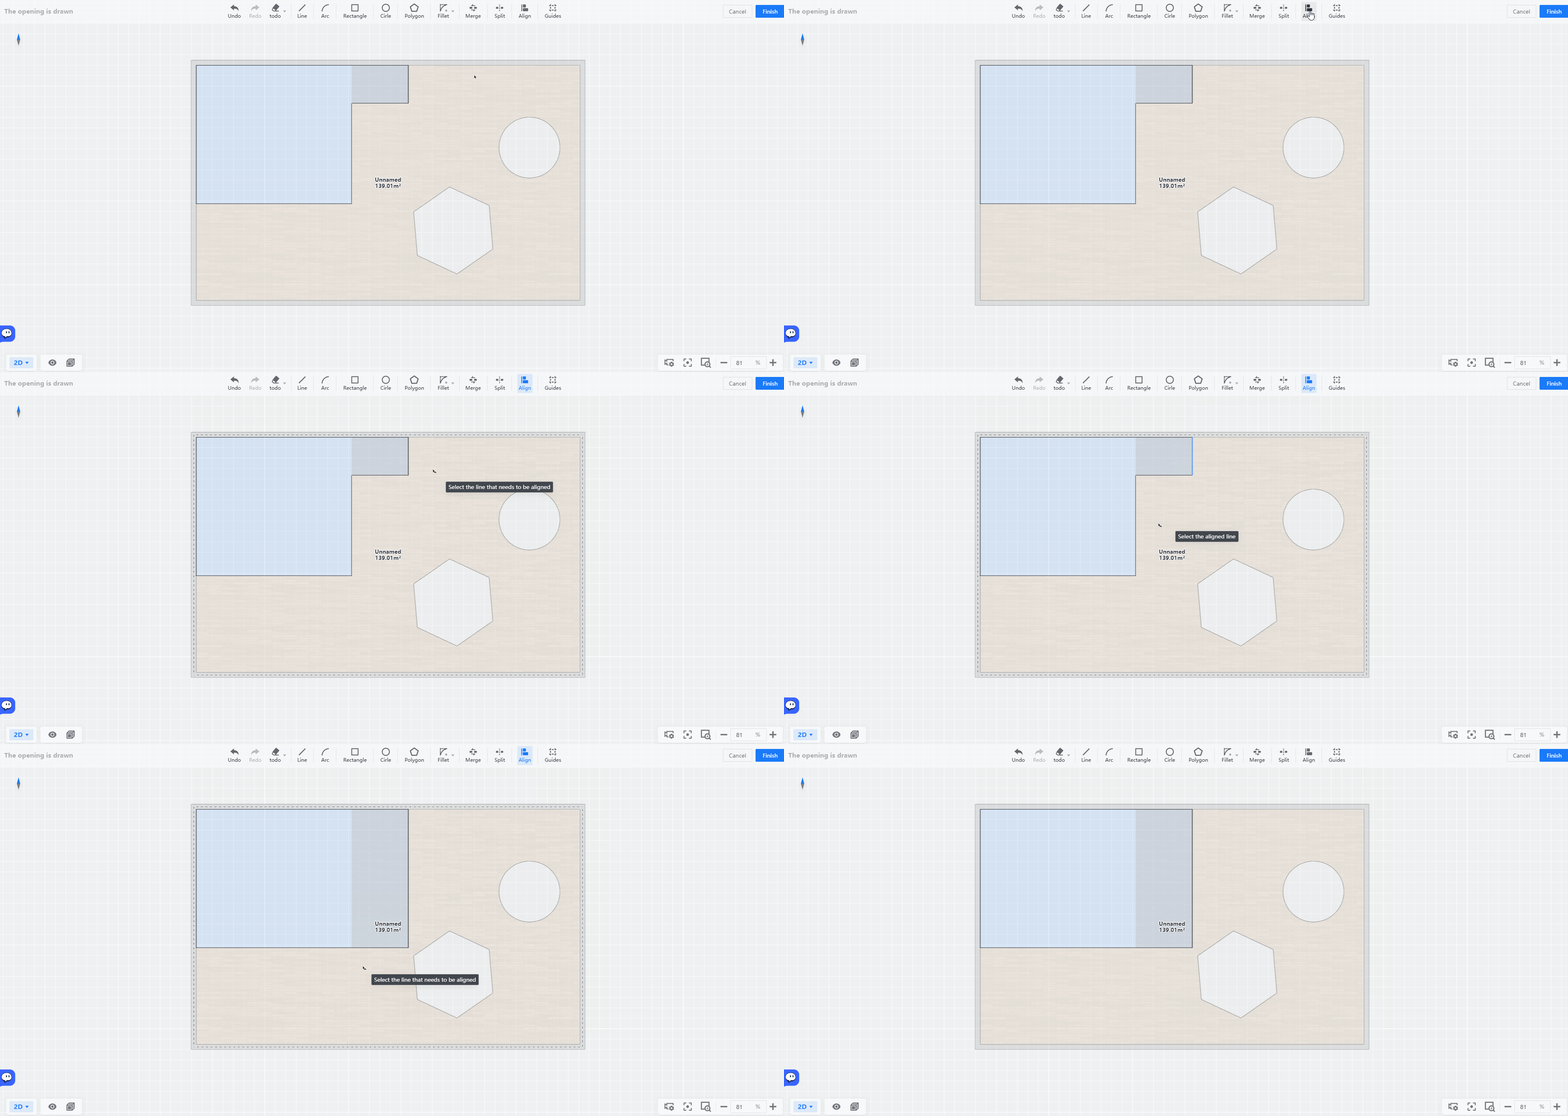
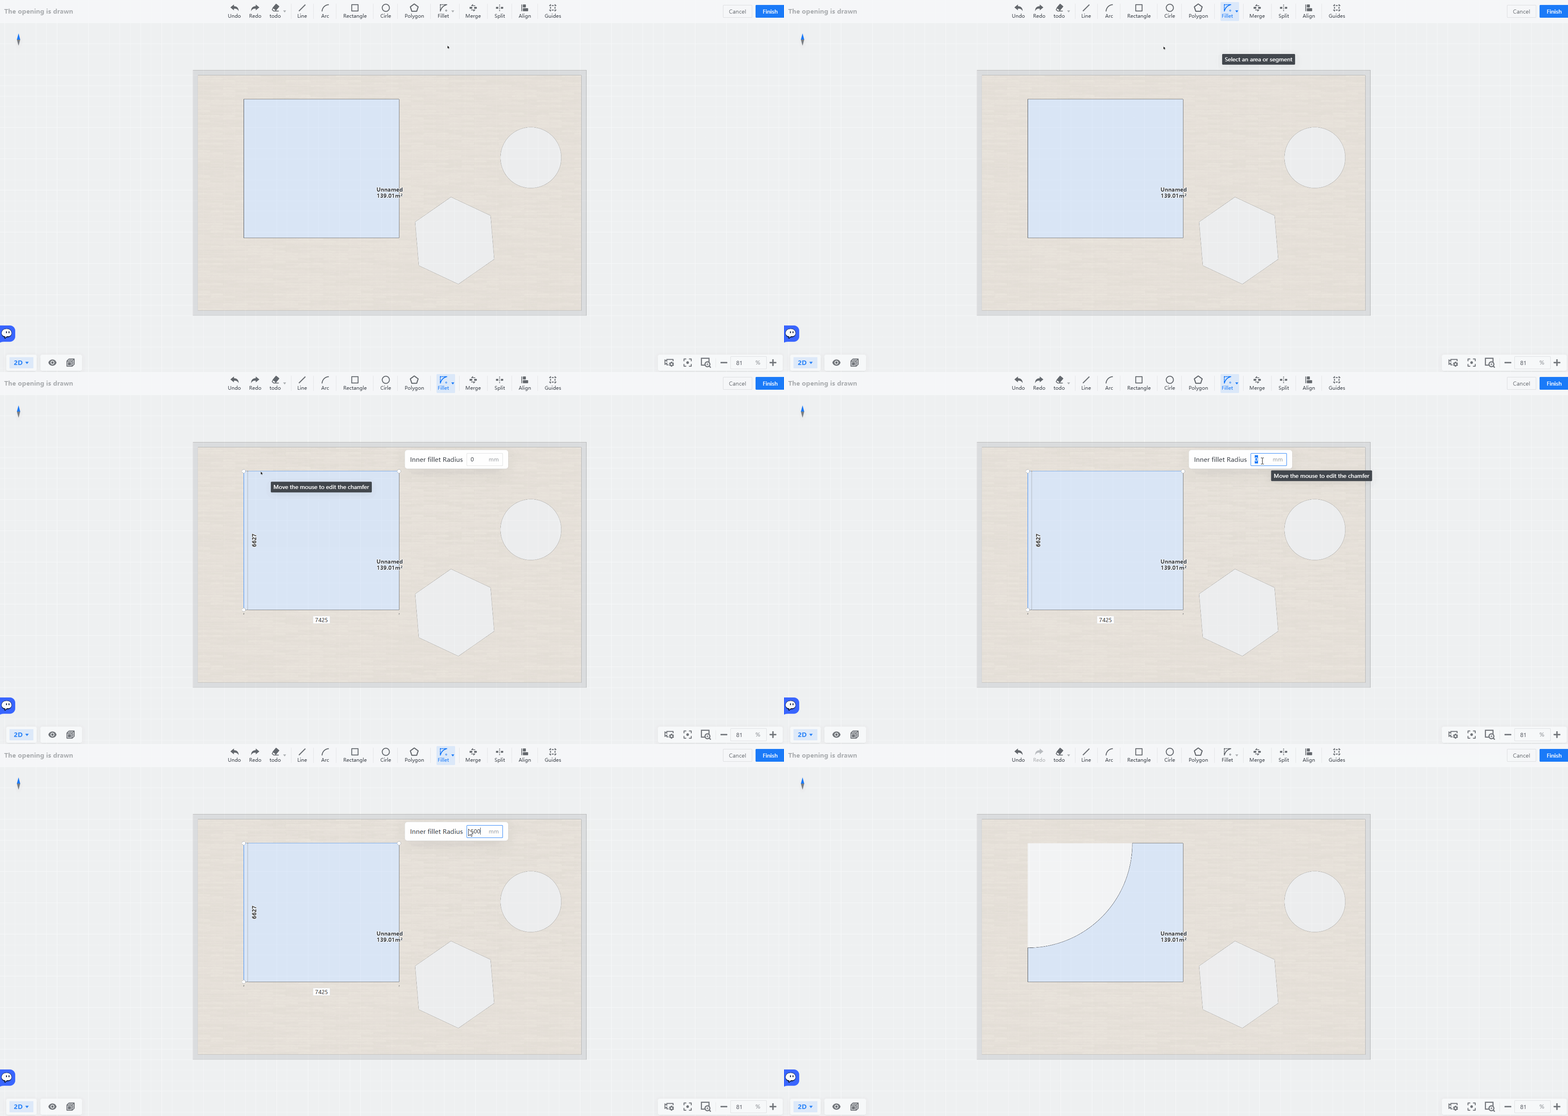
3. You can also use the**Fillet** to adjust contour shapes, supporting a variety of modes like **Fillet,** **Inner Fillet, Inner Right Angle, Chamfer**. Here are two chamfering methods:
**Method 1: Directly select an area to apply chamfering**
Click **Fillet** in the top toolbar, choose the desired mode, and directly select an area. You can move the mouse to edit the chamfer, When moving the mouse to the appropriate position, click the left mouse button to confirm.
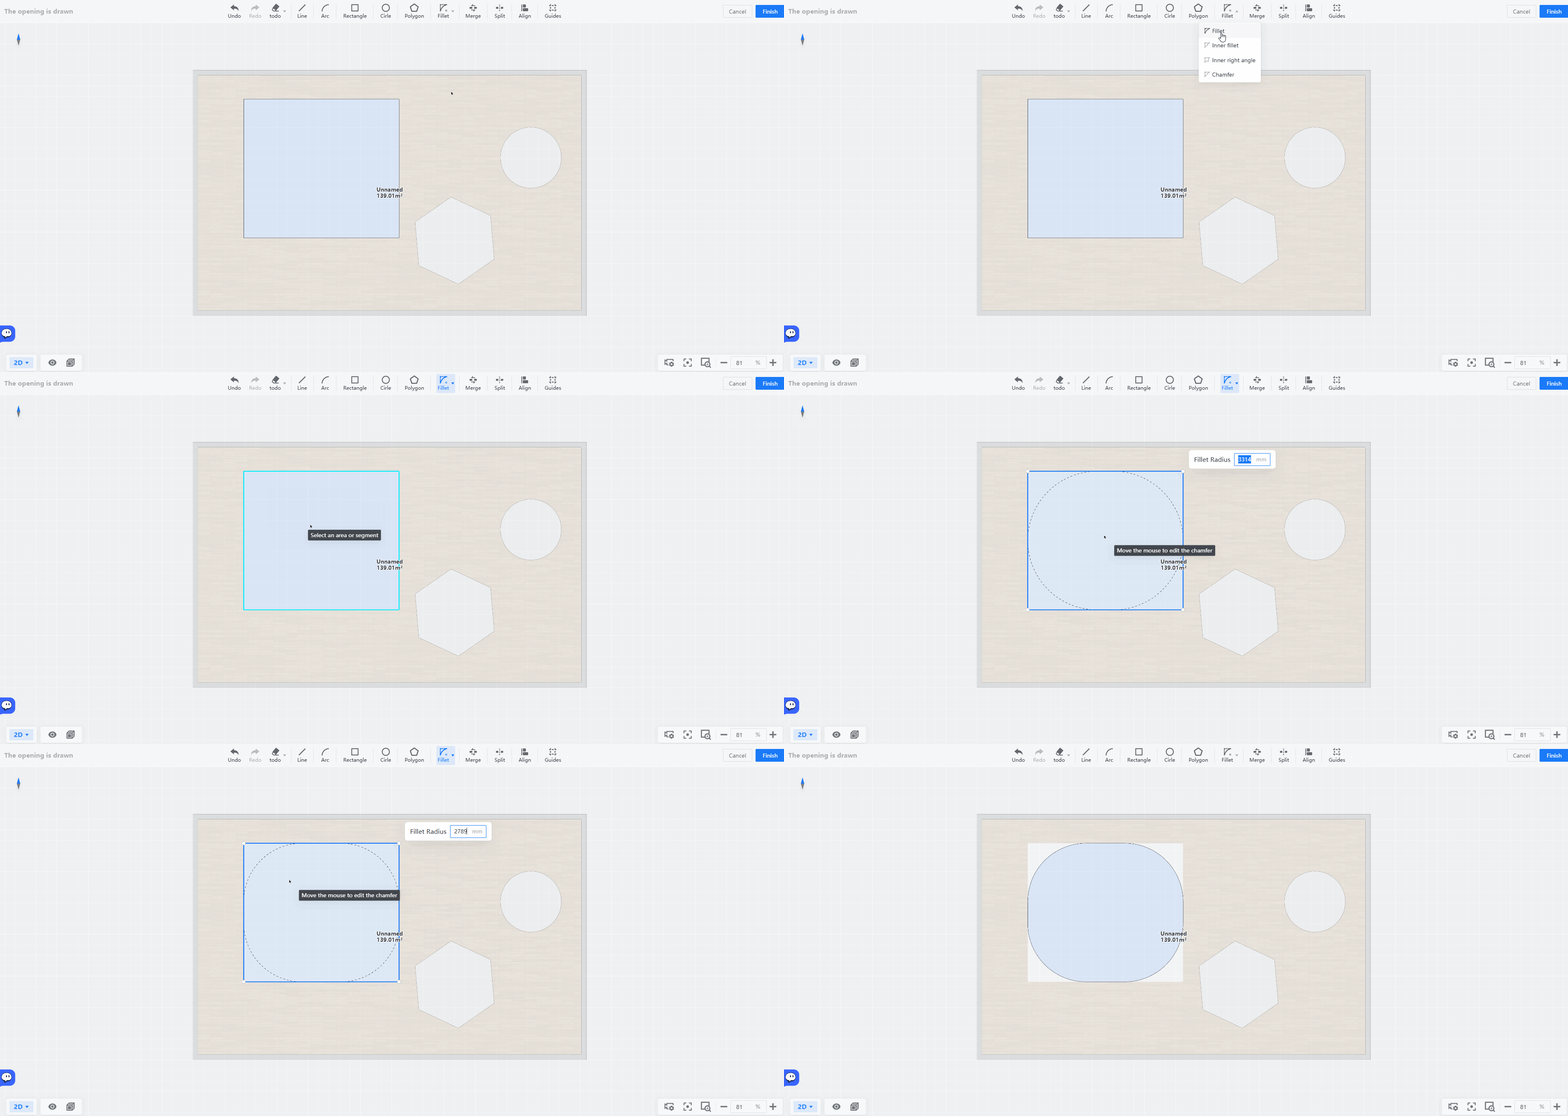
* You can also enter the **Fillet Radius** to edit the chamfer. After inputting, click the **Enter** key to confirm.
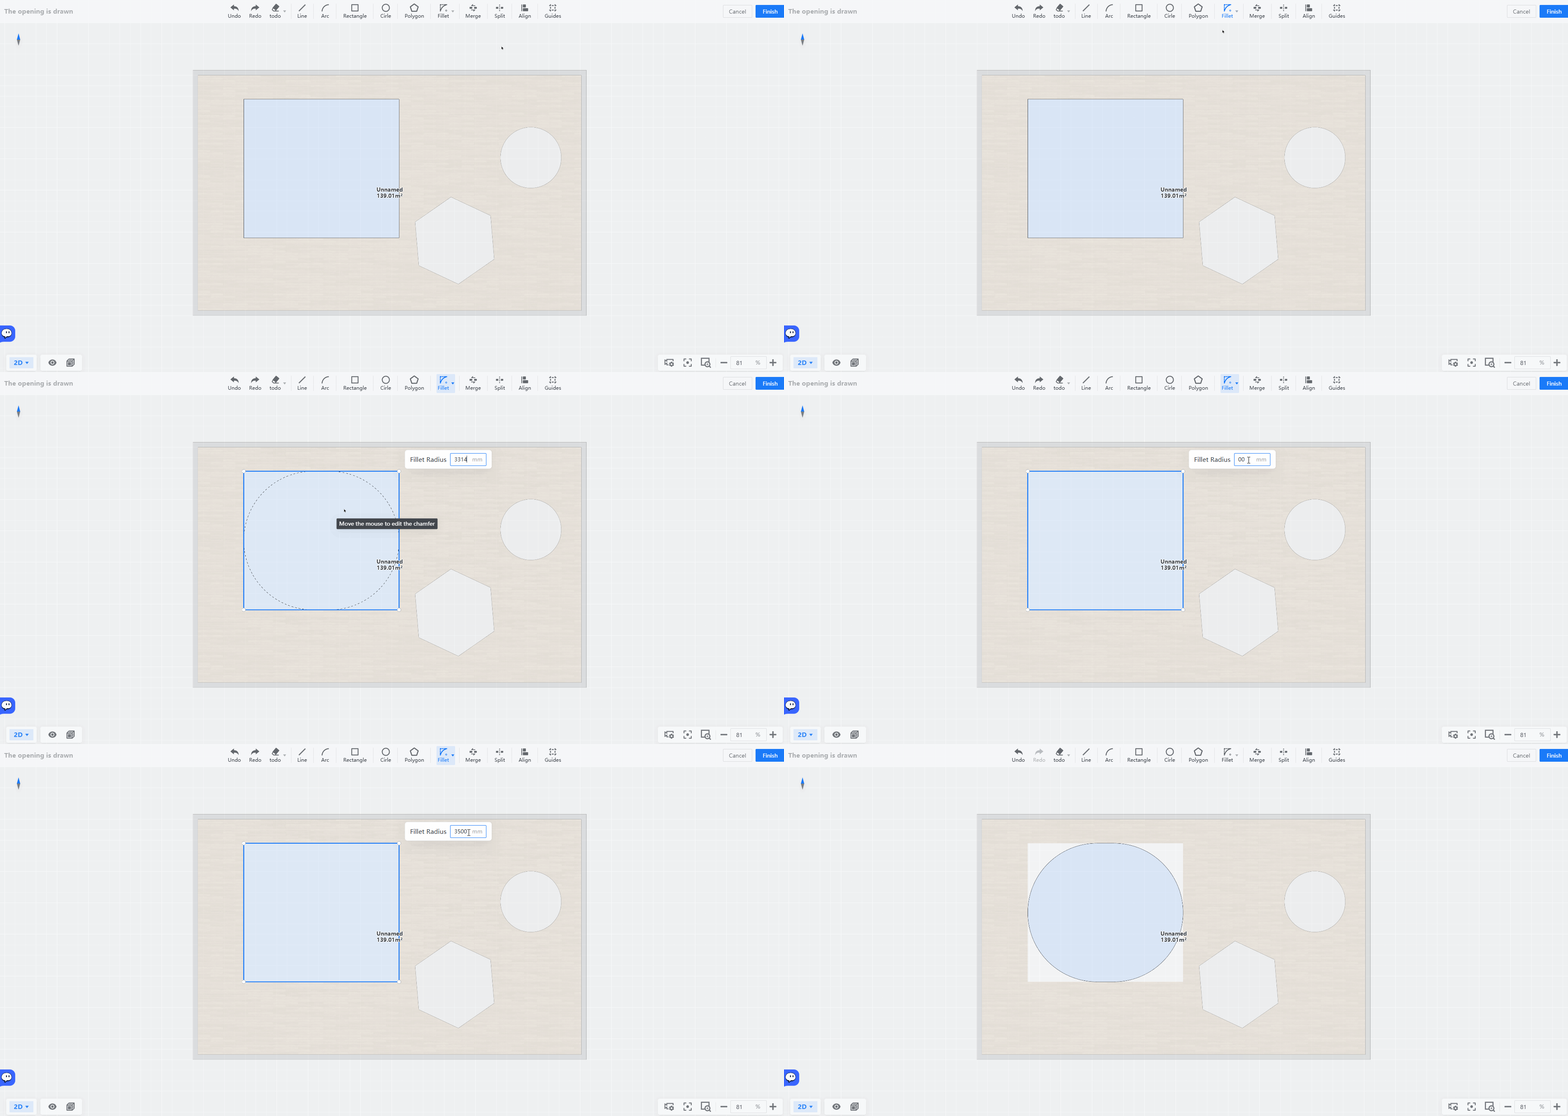
**Method 2: Select two connected straight lines to chamfer the angle**
Click **Fillet** in the top toolbar, choose the desired mode, then select two adjacent straight lines. You can move the mouse to edit the chamfer. When moving the mouse to the appropriate position, click the left mouse button to confirm.
* **Note: Inner Fillet can only be applied to right angles, and cannot be applied to other angles.**
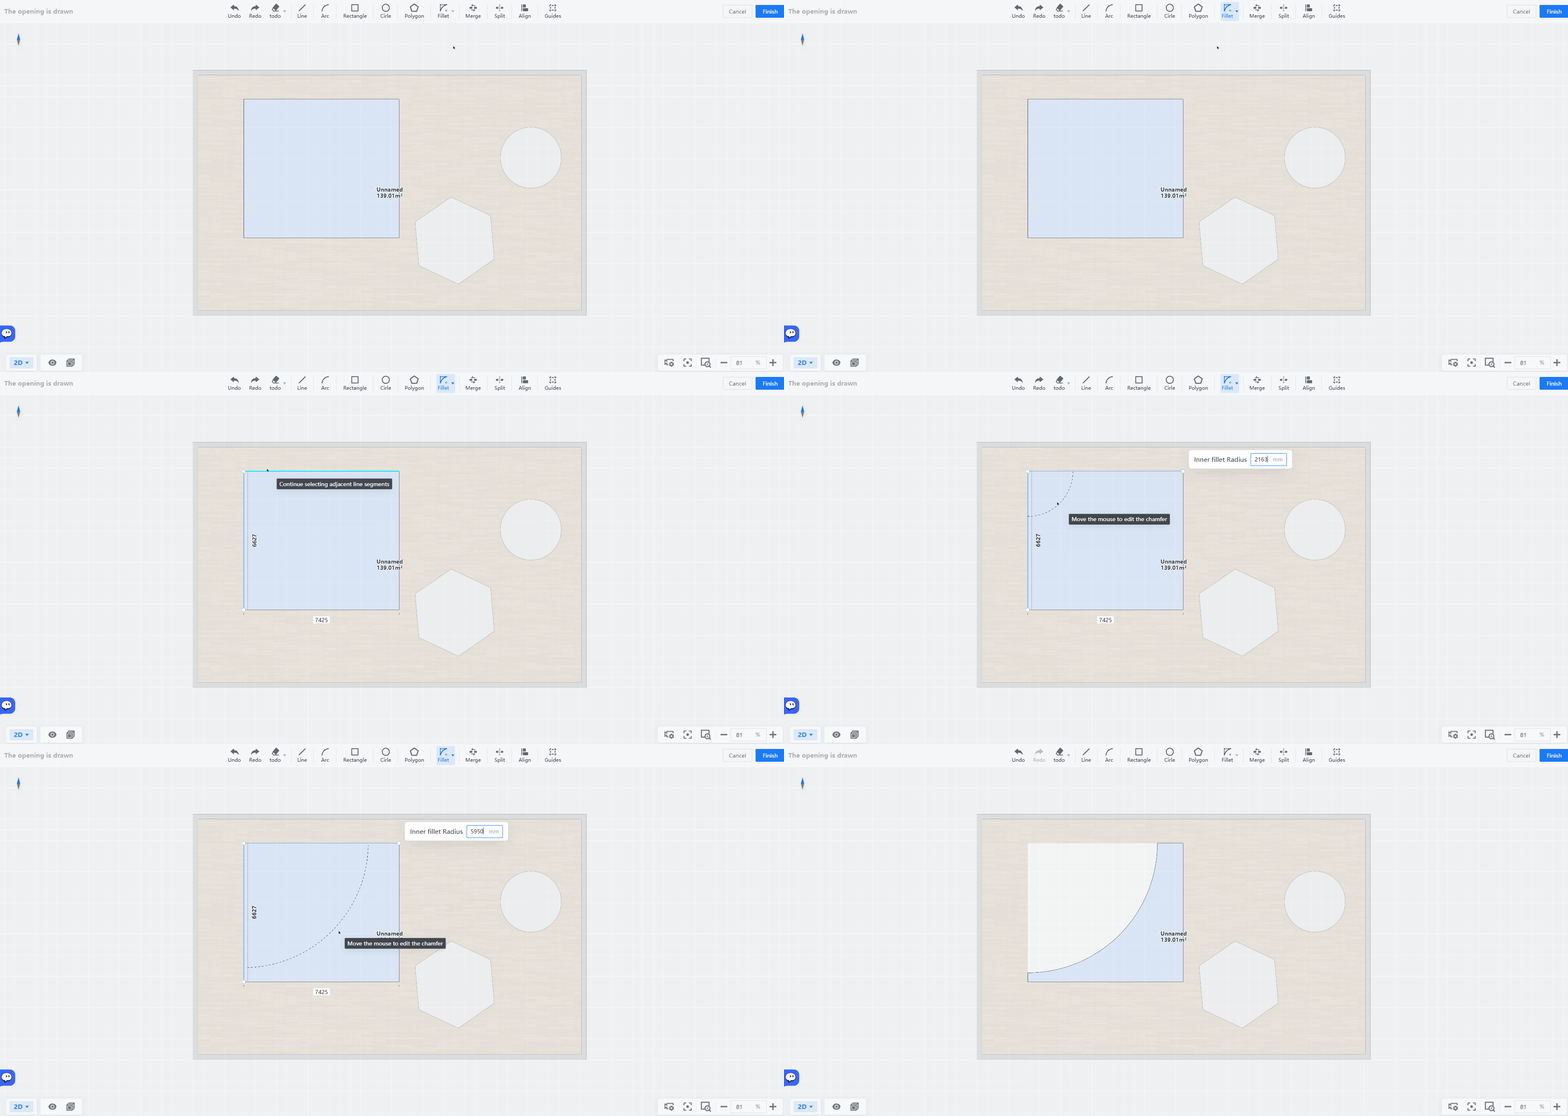
* You can also enter the **Inner** **Fillet Radius** to edit the chamfer. After inputting, click the **Enter** key to confirm.
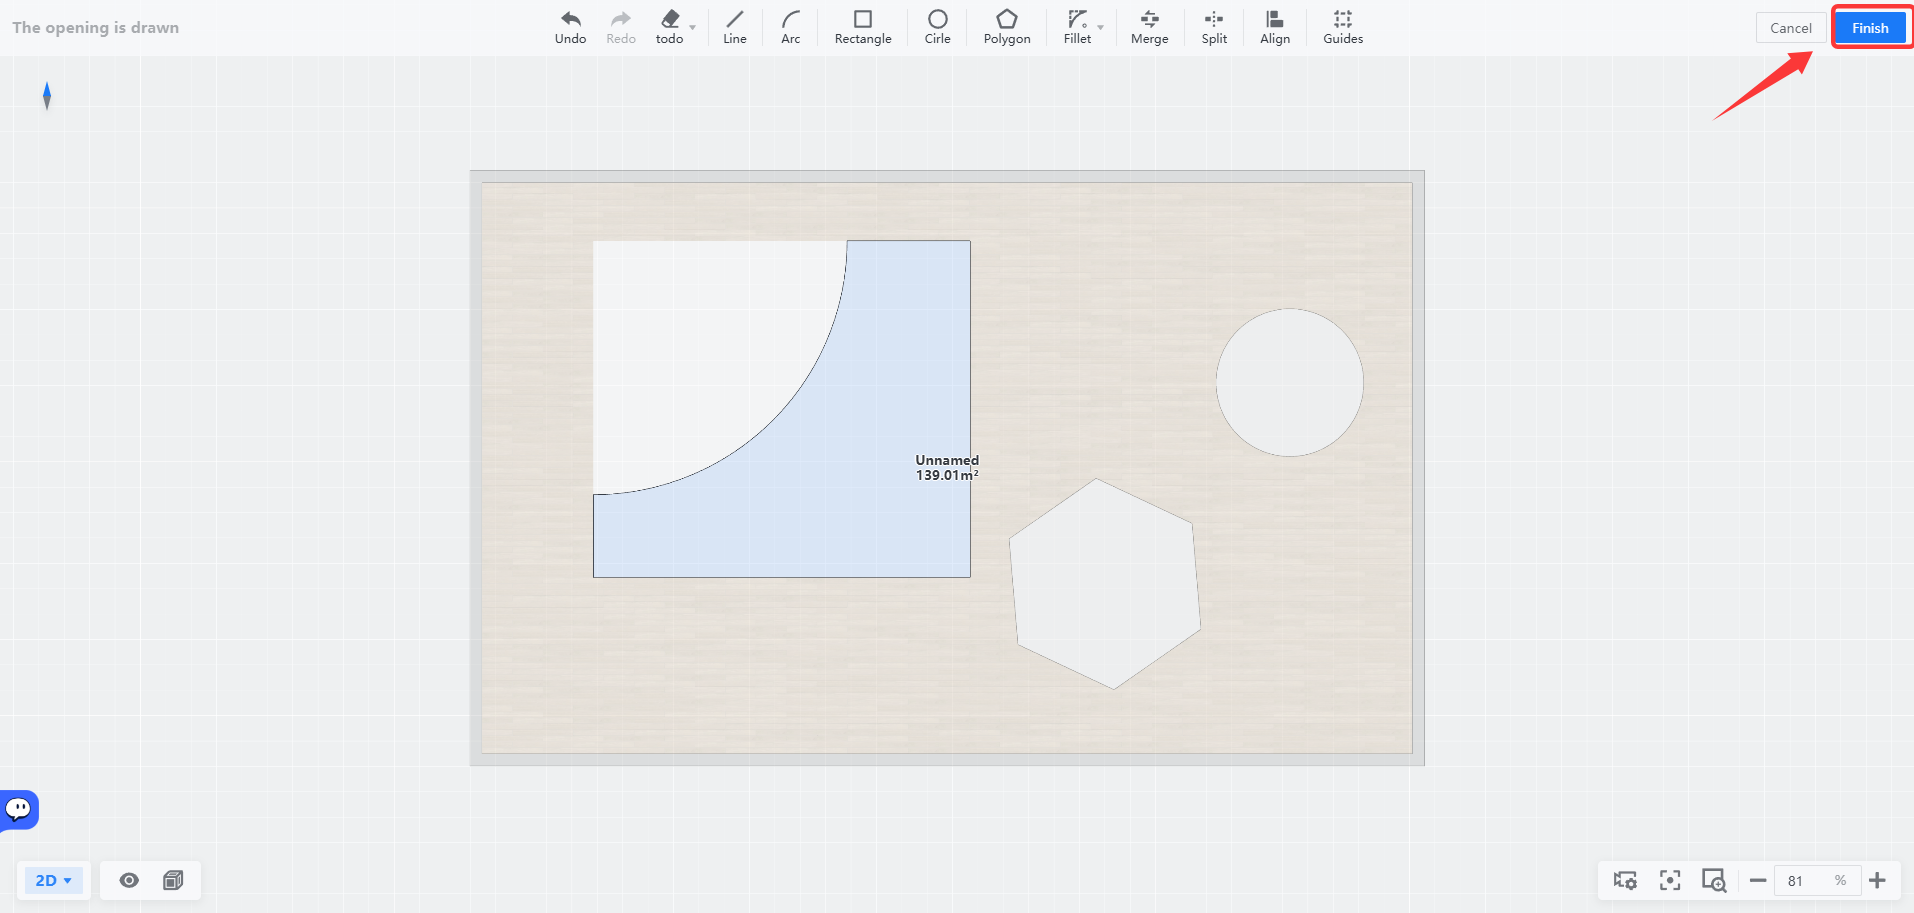
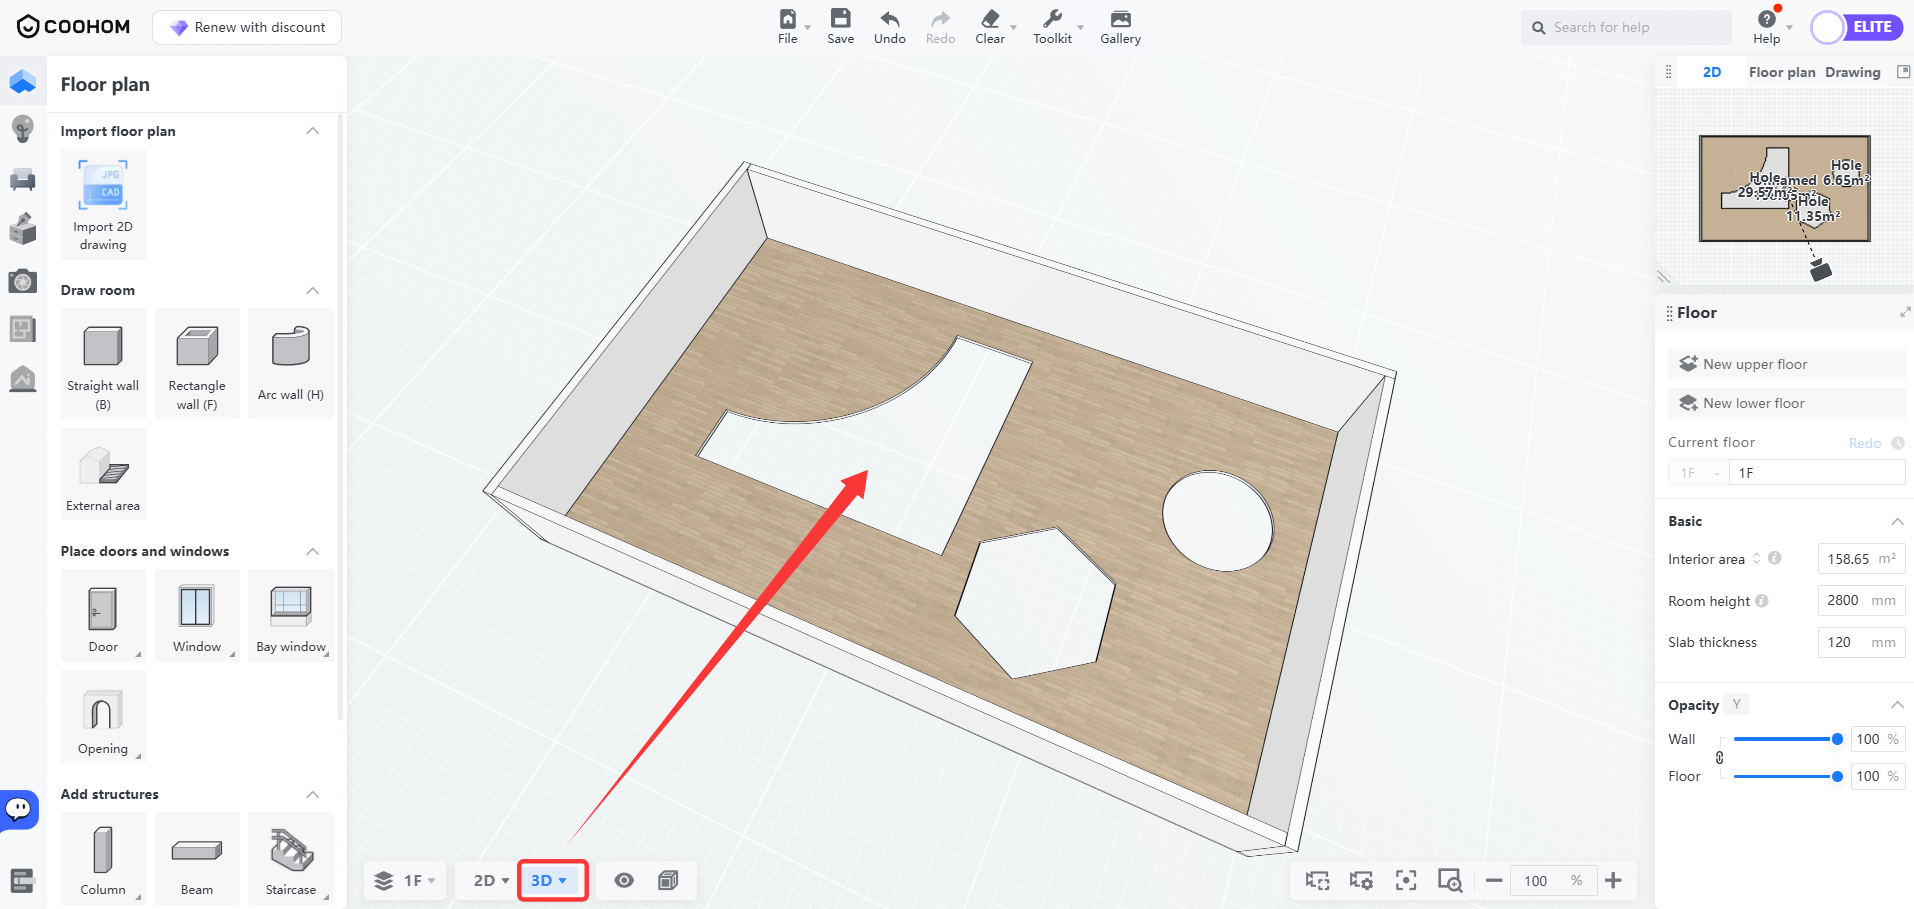
4. After editing, click **Finish** in the upper-right corner, switch to 3D view to check the effects.
Delete Openings
===============
There are two methods to delete openings:
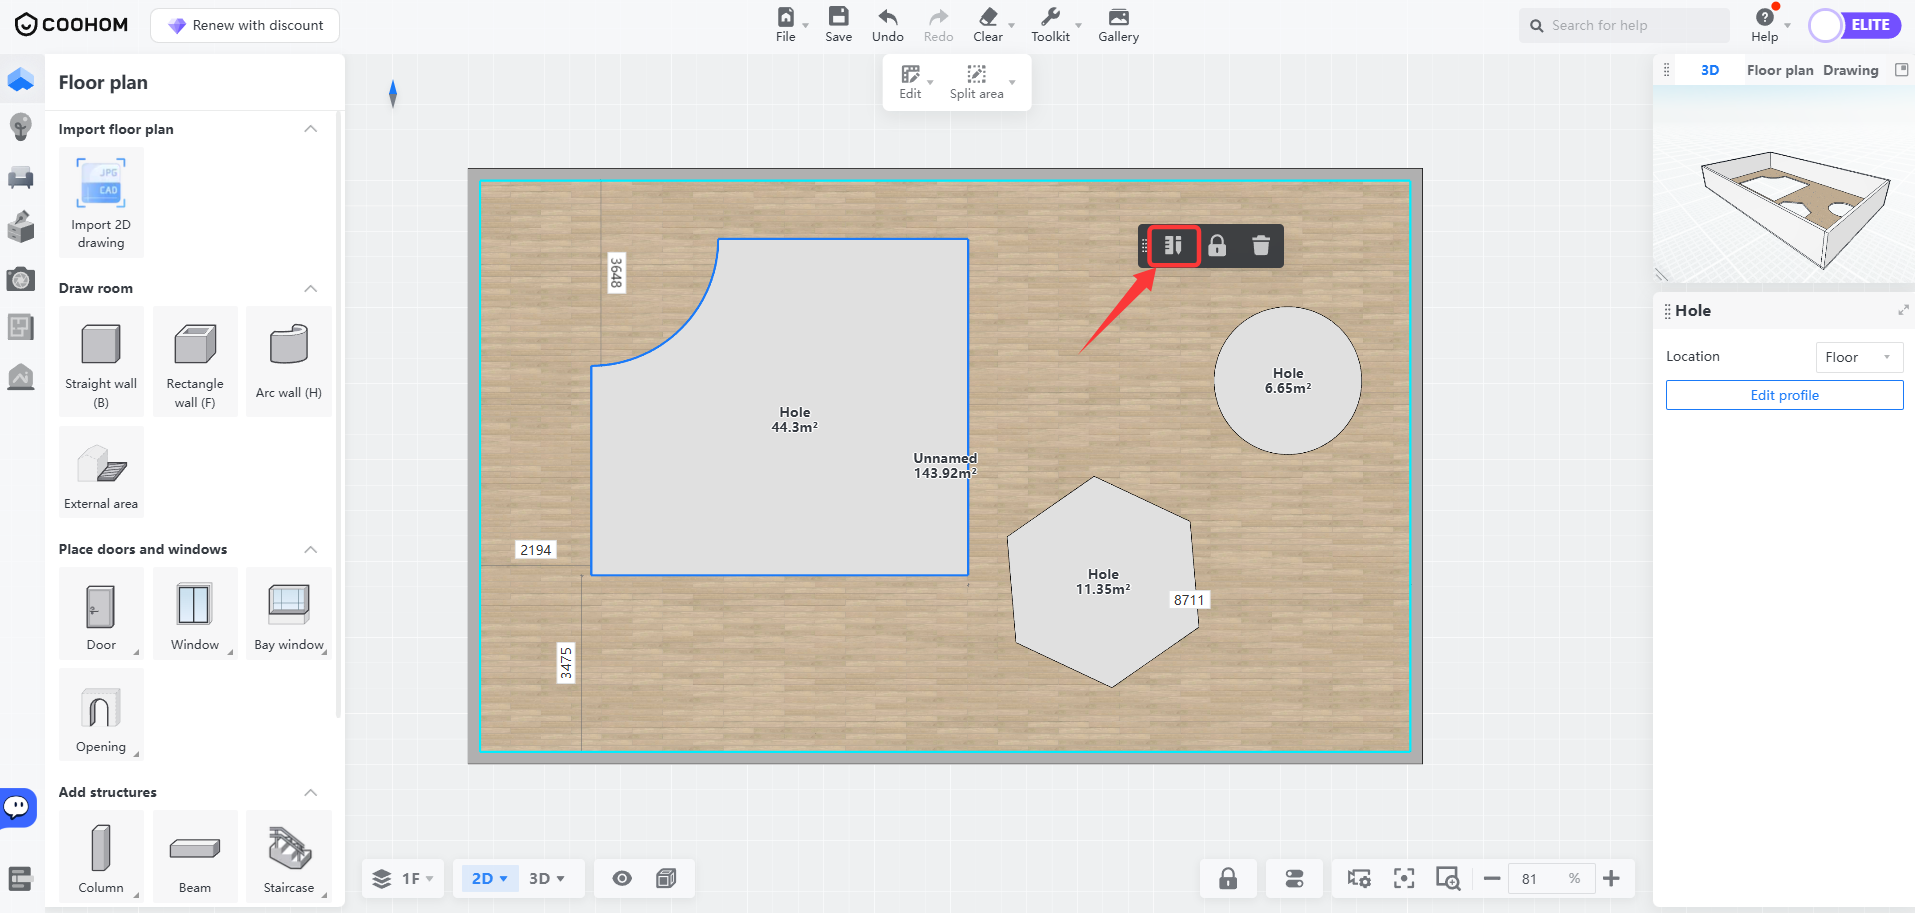
Method 1: On the floor plan interface, click the opening and then click the **Delete** button in the floating window.
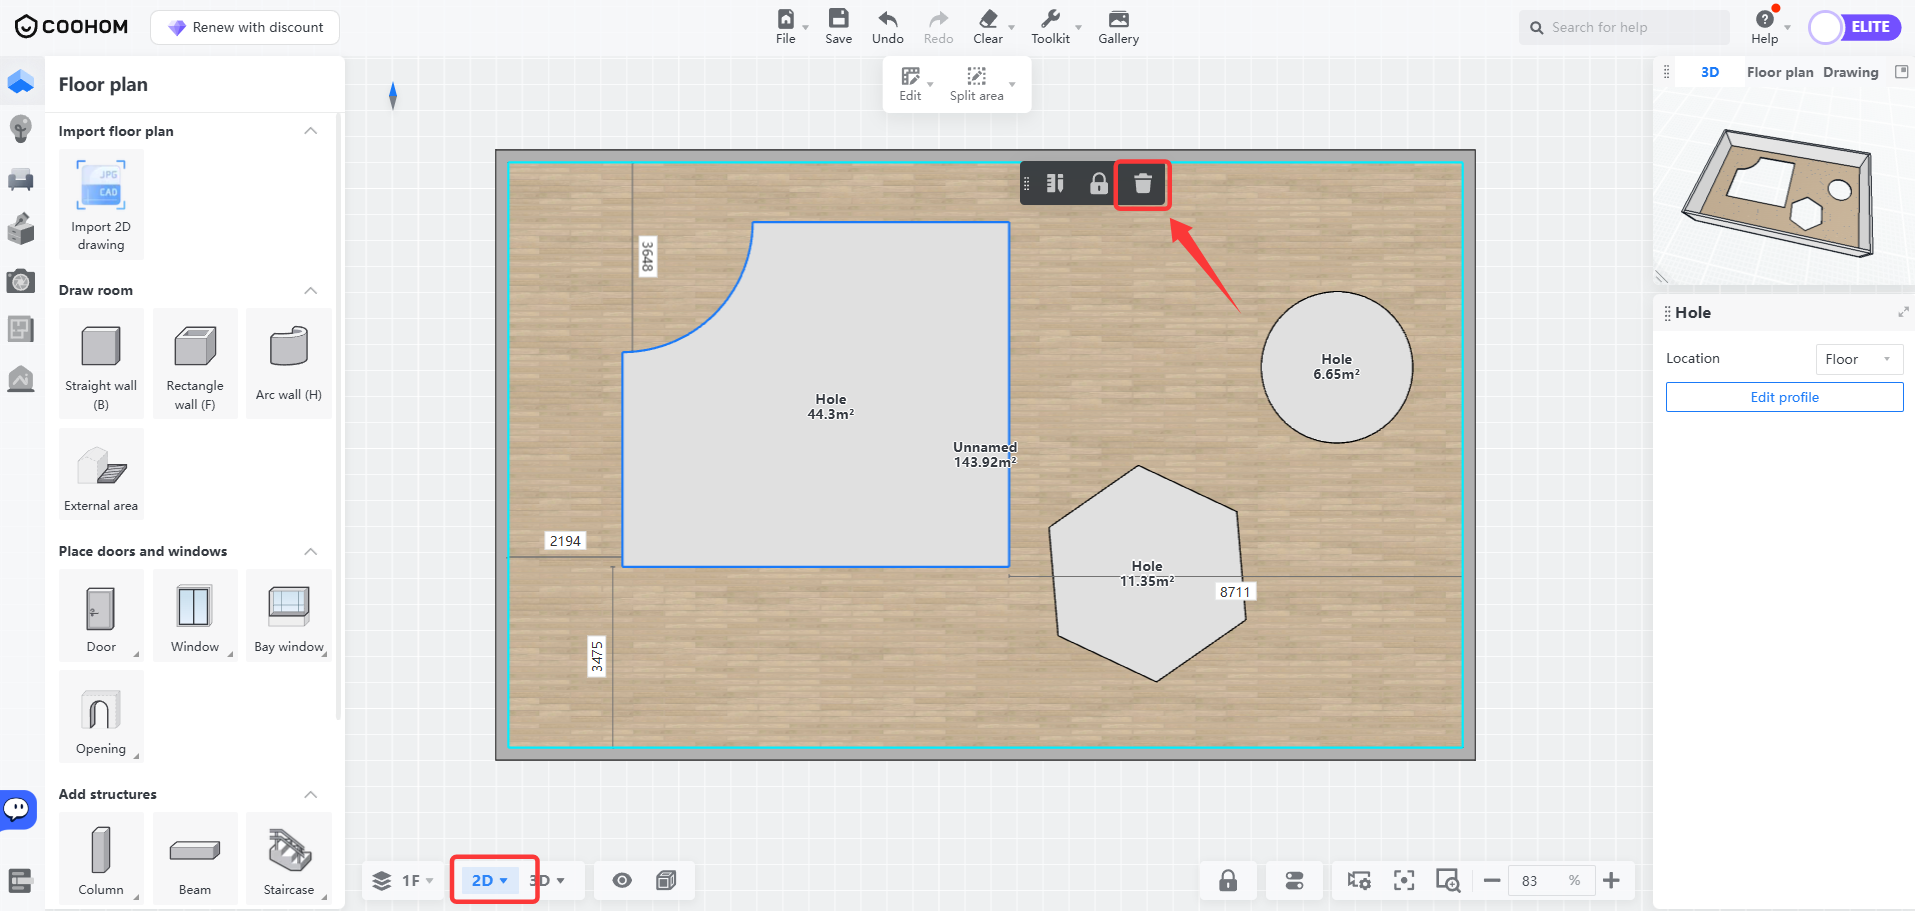
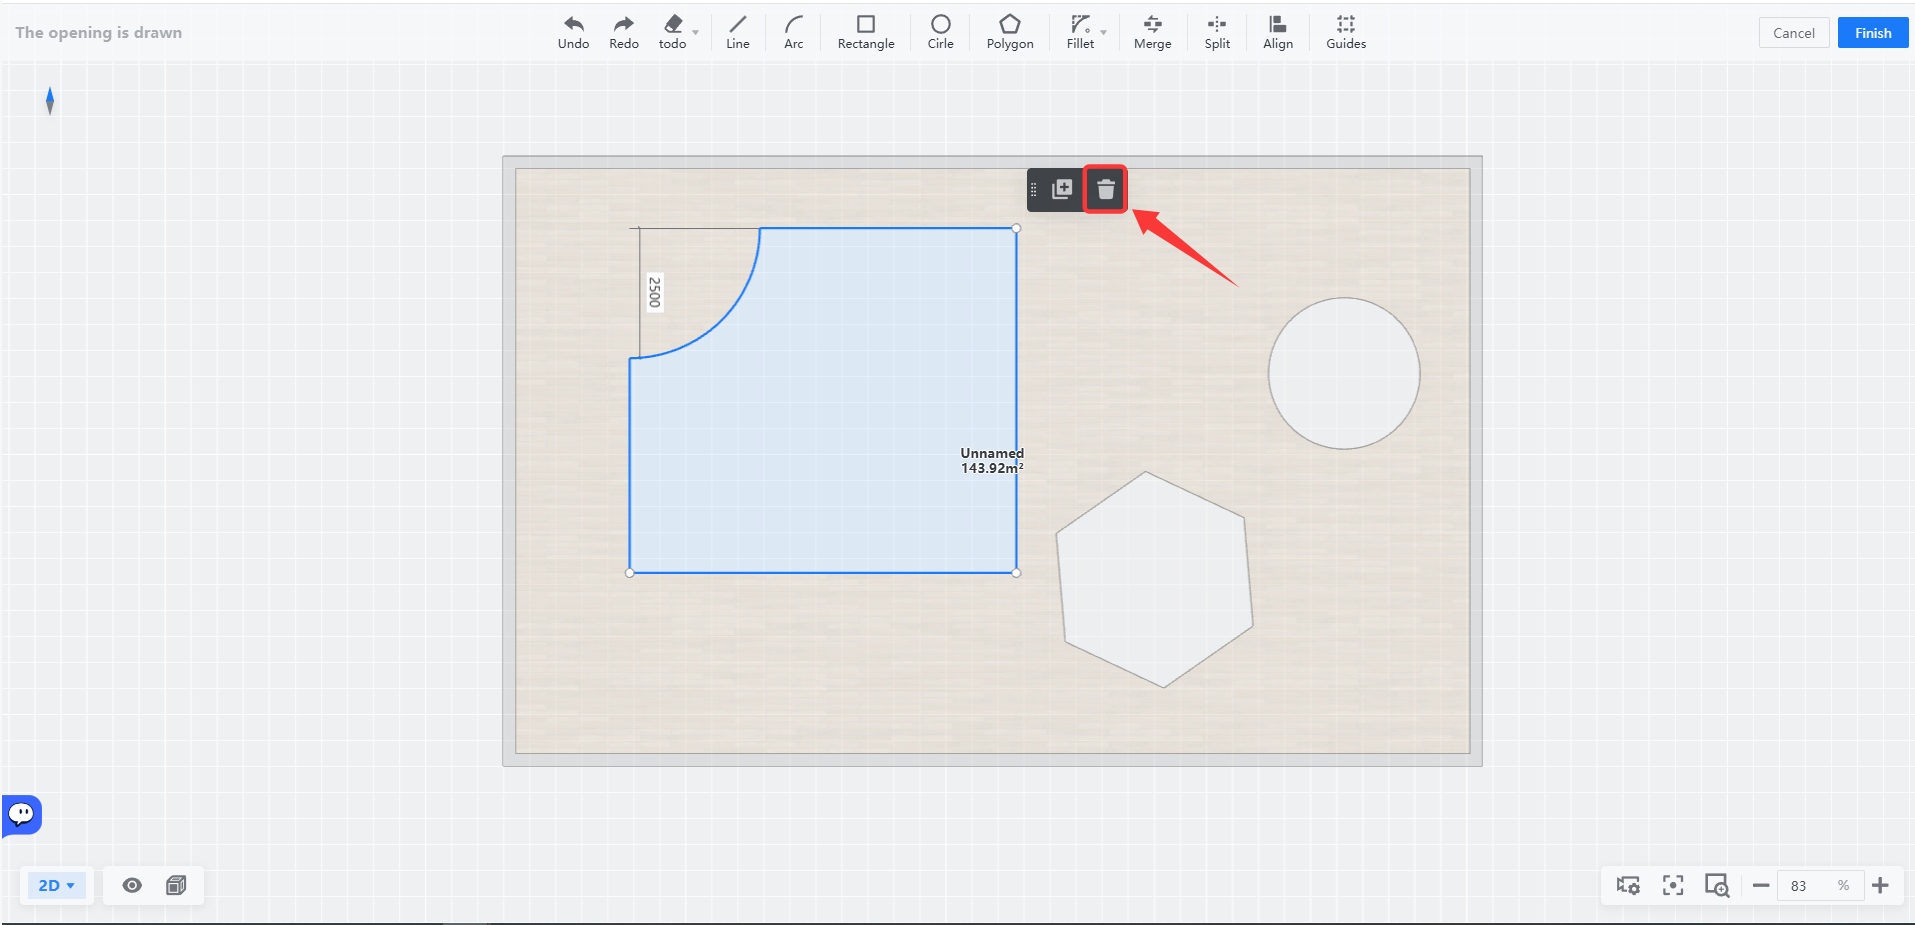
Method 2: Enter the opening editing interface, click the opening, and then click the **Delete** button in the floating window.
Notes
=====
1. Only closed contours can generate openings during drawing.
2. While editing already drawn openings, keep the closed contour unique.
3. During alignment operations, choose the reference position first, then select the line segment to move.